
How to Choose the Right Sieve Shaker for Particle Size Analysis
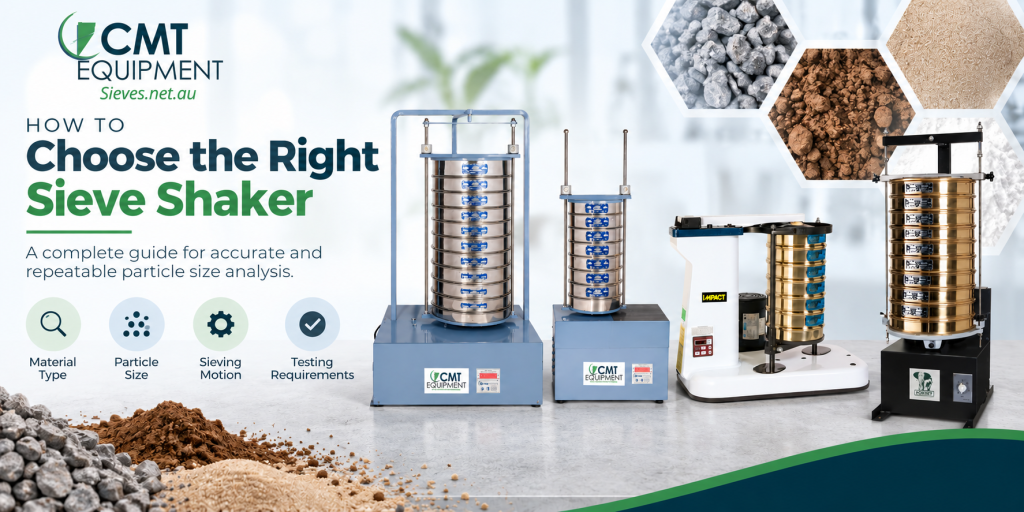
How to Choose the Right Sieve Shaker is an important question for anyone who needs accurate and repeatable particle size analysis. The right sieve shaker can improve separation efficiency, reduce manual effort, and help produce consistent results across different samples. However, the best model depends on several factors, including the material, particle size range, sample volume, sieve size, and testing requirements.
This guide explains what to consider before selecting a sieve shaker for laboratory or industrial particle size analysis.
Understand the Material You Are Testing
Start by identifying the material you need to analyse. Different materials behave differently during the sieving process, so one sieve shaker may not suit every application.
For example, fine powders may require controlled movement to prevent excessive compaction or sieve blockage. On the other hand, larger and heavier materials often need stronger movement to achieve effective separation.
Therefore, consider the following characteristics before choosing a sieve shaker:
- Particle size range
- Material density
- Sample weight and volume
- Moisture content
- Tendency to clump or agglomerate
- Dry or wet sieving requirements
When you understand how the material behaves, you can select a sieve shaker with the appropriate movement and capacity.
Consider the Particle Size Range
Particle size plays a major role in sieve shaker selection. Fine particles and coarse materials do not always require the same type of motion or testing conditions.
For finer particle size analysis, controlled and consistent vibration can help particles move through the sieve apertures efficiently. Meanwhile, larger particles may require stronger movement to distribute the material across the sieve surface.
In addition, choose test sieves with suitable aperture sizes for the particle range you need to measure. A complete sieve stack should separate the sample into the required particle size fractions without causing unnecessary delays or inaccurate results.
Choose the Right Type of Sieving Motion
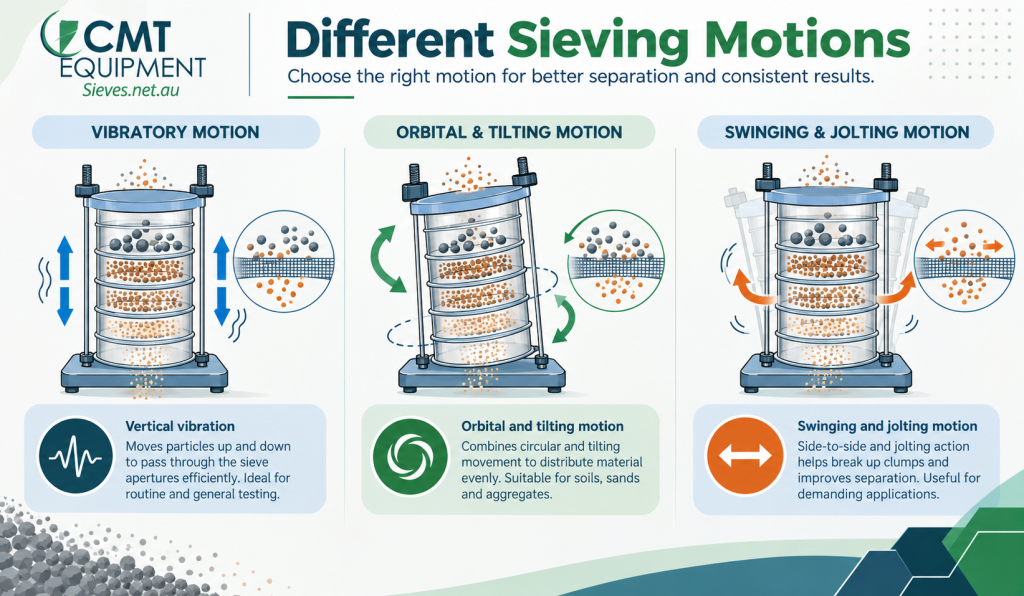
One of the most important steps in learning how to choose the right sieve shaker is understanding the available types of motion.
Different sieve shakers use different movement patterns. Therefore, the material and testing method should guide your selection.
Orbital and Tilting Motion
Orbital and tilting sieve shakers move the sample across the sieve surface while changing the position of the particles. As a result, this movement can help distribute material evenly across the sieve mesh.
This type of motion can suit applications involving soils, sands, aggregates, and other materials that require consistent particle movement.
Motorised Vibratory Motion
Motorised sieve shakers provide automated and consistent vibration. Therefore, they can help laboratories standardise their testing procedures and reduce differences caused by manual sieving.
They are particularly useful for routine testing where operators need reliable and repeatable results.
Swinging and Jolting Motion
Some materials clump together during testing. In these cases, swinging and jolting movements can help distribute the sample and improve separation.
Consequently, this type of motion may suit demanding applications where particles require more active movement to separate effectively.
Electromagnetic Motion
Electromagnetic sieve shakers provide controlled oscillation and precise adjustment. Therefore, they can suit laboratories that require a high level of control over their testing conditions.
However, the best motion depends on the sample. Always consider the material and particle size range before choosing a shaker.
Check Sieve Diameter Compatibility
Not every sieve shaker supports the same test sieve diameter. Before purchasing, confirm that the equipment works with the sieves you already use or plan to purchase.
Common test sieve diameters include:
- 200mm
- 300mm
- 450mm
Some sieve shakers accommodate more than one sieve diameter, while others are designed for a specific size. Therefore, compatibility should be checked before selecting the equipment.
Choosing compatible equipment can also help you avoid unnecessary investment in new sieve sets.
Consider Sieve Stack Capacity
The number of sieves you need for each test also affects your choice. A larger sieve stack allows you to separate more particle size fractions during a single testing cycle.
For example, a laboratory may need several sieves with different aperture sizes to analyse a sample accurately. In this situation, the sieve shaker must accommodate the full stack, including the lid and receiver.
Therefore, consider:
- The number of sieves required for each test
- The sieve diameter
- The total height of the sieve stack
- Whether you need a lid and receiver
- The capacity required for future testing
A suitable stack capacity can improve efficiency and reduce the need to repeat tests.
Match the Shaker to Your Sample Volume
Sample volume is another important consideration. A small research laboratory may process only limited sample quantities, while an industrial testing facility may handle larger samples every day.
Therefore, ask how much material you need to test during each cycle.
A compact sieve shaker may suit small and occasional tests. However, a larger and more robust unit may be more suitable for regular or high-volume testing.
Selecting equipment with the right capacity helps prevent overloading. Overloading can reduce particle movement and affect the efficiency of the sieving process.
Decide Whether You Need Dry or Wet Sieving
Most applications use dry sieving. However, some fine or difficult materials may not separate effectively when dry.
Fine particles can stick together, attach to larger particles, or block sieve apertures. Therefore, wet sieving may provide a more suitable method for certain applications.
Before selecting a sieve shaker, determine whether you need:
- Dry sieving only
- Wet sieving only
- Both dry and wet sieving
If wet sieving is required, make sure the sieve shaker and related equipment support the process. You may also need compatible wet washing lids, receivers, and other accessories.
Choosing this capability in advance can give your testing process greater flexibility.
Look for Adjustable Testing Settings
Adjustable settings can help improve consistency because different materials may require different testing conditions.
Depending on the model, useful features may include:
- Adjustable vibration or amplitude
- Variable movement
- Digital controls
- Programmable testing times
- Automatic shut-off
- Built-in timers
For example, a timer allows operators to run each test for the same duration. As a result, laboratories can maintain more consistent testing conditions and improve repeatability.
However, not every application requires advanced controls. Therefore, choose features that provide practical value for your specific testing requirements.
Consider Testing Frequency
The frequency of use can influence the type of equipment you need.
For occasional testing, a standard sieve shaker may provide suitable performance. However, facilities that perform testing throughout the day may require more durable and robust equipment.
Consider:
- How many tests you perform each day
- How long each testing cycle takes
- Whether multiple operators use the equipment
- How frequently the equipment operates
- Expected future testing requirements
Choosing equipment based on actual usage can provide better long-term value.
Focus on Repeatability and Accuracy
Particle size analysis requires consistent testing conditions. Even small differences in movement, test duration, or sample loading can affect results.
A sieve shaker can help standardise the testing process by providing controlled and repeatable motion. Therefore, automated equipment can reduce the variation that may occur with manual sieving.
For more reliable results, use compatible test sieves and follow the relevant testing procedures. In addition, inspect sieves regularly to ensure the mesh remains clean and undamaged.
The sieve shaker and test sieves should work together as part of a controlled testing process.
Consider Ease of Use and Maintenance
Ease of operation is often overlooked when selecting testing equipment. However, simple controls and easy setup can save time, particularly in busy laboratories.
Look for features such as:
- Easy sieve clamping
- Clear controls
- Simple timer adjustment
- Easy loading and unloading
- Accessible components
- Straightforward cleaning
Regular maintenance can also help maintain consistent performance. Therefore, choose a model that suits your team's ability to operate and maintain it properly.
Check Available Space and Power Requirements
Before purchasing, check where the sieve shaker will be installed.
Measure the available bench or floor space and consider the equipment's weight. You should also check the power requirements and make sure the location supports safe operation.
In addition, consider the level of noise and vibration produced during testing. A laboratory may require different equipment from an industrial facility where stronger movement and larger equipment are acceptable.
Choosing the right size for your workspace can make installation and daily operation easier.
Compare Long-Term Value Instead of Price Alone
Price is an important factor, but it should not be the only consideration.
A lower-priced sieve shaker may cost more in the long term if it cannot handle your required sample volume, sieve stack, or testing frequency. Similarly, purchasing an oversized model may not provide good value for a laboratory with simple testing requirements.
Therefore, compare:
- Equipment capacity
- Motion type
- Sieve compatibility
- Durability
- Adjustable settings
- Wet sieving capability
- Maintenance requirements
- Expected usage
The right choice should provide suitable performance for your current requirements while supporting future testing needs.
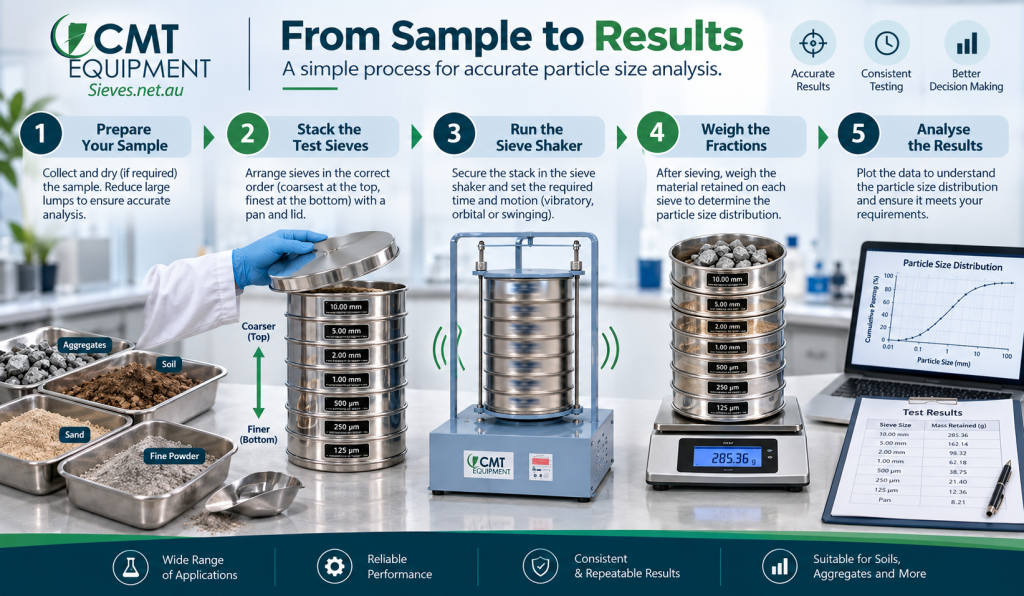
A Simple Checklist for Choosing a Sieve Shaker
Before making a decision, ask the following questions:
- What material will I test?
- What particle size range do I need to analyse?
- Which sieve diameters will I use?
- How many sieves are required in each stack?
- What sample volume will I process?
- Do I need dry sieving, wet sieving, or both?
- Which type of motion suits my material?
- How often will I use the sieve shaker?
- Do I need adjustable settings or a built-in timer?
- What space and power requirements do I have?
Answering these questions can help you narrow down the available options and select equipment that matches your application.
Final Thoughts
Understanding how to choose the right sieve shaker can help you select equipment that supports efficient and repeatable particle size analysis. The right model should match your material, particle size range, sample volume, sieve diameter, testing frequency, and method.
In addition, consider the type of motion, stack capacity, adjustable settings, and wet sieving requirements. Rather than selecting equipment based on price alone, focus on the features that will support your testing process over the long term.
At Sieves.net.au, you can explore a range of sieve shakers and test sieves for different laboratory and industrial applications. By matching the equipment to your specific requirements, you can create a more efficient and consistent particle size analysis process.